
The photographic community has countless articles and videos on cameras, lenses, and other equipment, but (with the exception of a certain video by Chris and Jordan when they were still part of The Camera Store) there doesn't seem to be as much in-depth discussion when it comes to the options for carrying cameras and lenses.
This article/blog entry aims to provide a more exhaustive list of the pros and cons of camera carrying tools and accessories. There's a wide variety of options out there, but for simplicity, most of them will be classified under 3 broad categories:
- bags
- straps
- holsters
[1] BAGS
Bags allow the most volume for storage, and they provide the most protection of your gear against the elements (or theft). These can also be used to store non-photography essentials such as passports, folding umbrellas, or energy bars to keep you charged throughout the day.Bags are terrific for transportation, but when it comes to the actual shooting at the location, the other options (straps and holsters) are better in terms of keeping the gear accessible for fast shooting.
Regular bags vs. dedicated camera bags

Regular (non-camera) bags are great because they don't have those annoying brand logos that announce that you're carrying several thousand dollars' worth of equipment.
They don't offer the padding of dedicated camera bags, but some modicum of protection can still be obtained by wrapping only the most fragile items in pouches, soft cloth, and whatnot.


This selective padding means that you can cram more gear into a bag of the same volume, but this involves playing Tetris with your equipment. As such, it can be difficult to keep track of specific items when they're buried beneath other gear.
In contrast to regular bags, dedicated camera bags typically come with a ton of padding. Although the padding can also take up quite a bit of space (hence limiting the amount of gear you can cram into the bag), they do offer the greatest amount of protection against impact.

Another crucial benefit of these padded compartments is that they make it significantly easier to keep track of the items being stored since an empty compartment could remind you that an item has yet to be packed with the rest of the equipment. For example, I was packing up at a convention and I almost left behind my small on-camera flash, but I noticed that the spot for it in my camera bag was empty.
STYLES
1.1) 2-strap backpacks


These are the best option for prolonged carrying due to the even weight distribution on the shoulders.
However, backpacks can become uncomfortably hot against your back unless they use some sort of mesh material to ventilation.
Note also that items in the bag are impossible to access while you're wearing the backpack using both straps. Some people wear their regular backpacks in front to keep it accessible, but that technique doesn't work well for dedicated camera bags in particular due to the thick padding.
1.2) sling bags


Sling bags allow the user to easily access items without having to take the bag off. Side access is super handy for changing lenses out on the field: no need to put your bag down or juggle your camera and lenses as you swap.


Note however that these tend to be designed to be carried on a specific side (i.e. the right shoulder). Because all the weight is placed on one side, your shoulder will probably ache after several hours of using this.
1.3) shoulder bags


Admittedly, I don't own one of these; hence, the laptop bag as a stand-in for these sample pictures.
Similar to the sling bags, shoulder bags keep your stuff within reach, and the weight is carried by one shoulder. Unlike the single-strap backpack though, you can simply alternate between left and right shoulders to minimize fatigue.
The reason why I don't own one of these is that the center of gravity (approx. waist-level) is too far from where the strap is hung around (the shoulders). Move around too much, and the bag and its contents will swing around. Compared to backpacks, the strap is more exposed which could make it easier for potential thieves to grab or cut off.
[2] STRAPS
In contrast to bags which are best for storage and transport during travel, straps are more suitable for actual shooting once you're on location. Your camera is already out and ready; the strap is just there to keep you from dropping the camera.STYLES
2.1) the default neck strap


Pretty much every DSLR/mirrorless camera comes with one of these, and it's common for photographers to immediately ditch these to avoid neck pain.
In addition to that, the strap limits the range of motion while shooting with the camera. This means that you'll have to take the strap off your neck if you intend to take high-angle overhead shots or low-angle macro shots.
Also, (for event photographers) neck straps don't seem to work well with speedlights + modifiers.


Since these are attached to the camera via the eyelets on top, you don't have to worry about blocking the tripod mount or the battery/card compartment at the bottom of the camera.

2.2) shoulder straps


A lot of people seem to find this more comfortable than the default neck strap. The most popular brand at the moment is Blackrapid, but other brands such as the Carry Speed here offer similar options.
Personally, it's not my cup of tea because (like shoulder bags) they swing around too much.
On the flip side, this is definitely an option to consider if you're using a speedlight as on-camera flash.


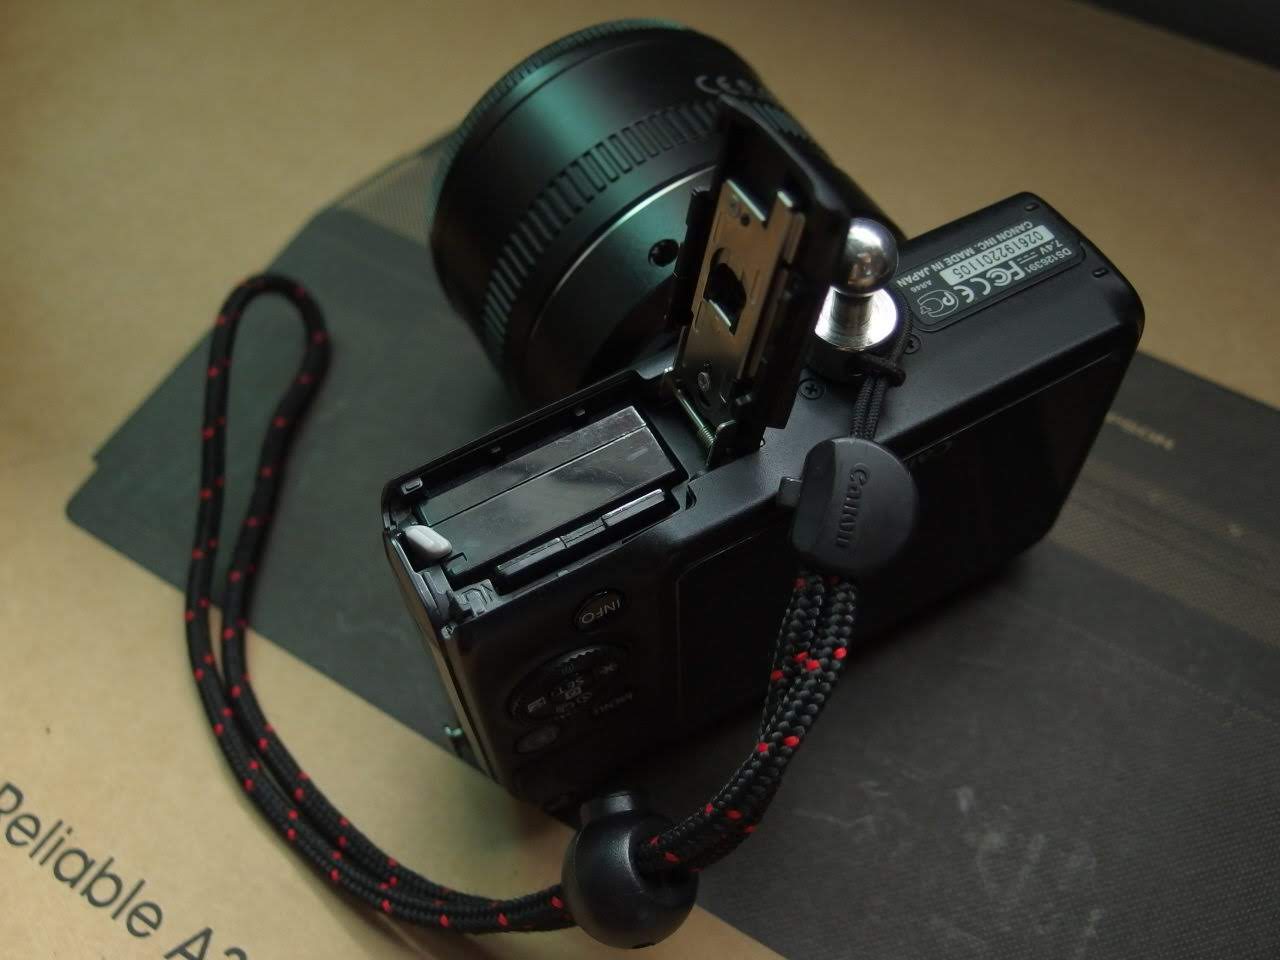
To my limited knowledge, all shoulder straps are attached to the camera via the 1/4-inch thread at the bottom.


Attaching a tripod plate would require an additional in-between plate. On smaller cameras, this can block access to the battery/card compartment.


EOS 600D: still workable

EOS M: SD card/battery compartment is inaccessible
2.3) wrist strap

For the minimalist, there's the wrist strap. It offers no weight support since you still have to actively maintain a grip on your camera, but at least it prevents your camera from dropping directly to the ground should your hand happen to slip.

If your camera doesn't have the more traditional eyelets for straps, it's still possible to attach a wrist strap to your camera via other accessories that fit in the 1/4-inch tripod mount at the bottom.


2.4) hand strap
Unlike the wrist strap which goes around the wrist, the hand strap goes around the hand. The distinction may seem silly, but I couldn't possibly overstate how fundamentally different they are.
What makes hand straps so awesome is that they pretty much meld the camera to your hand. Simply put, you don't even have to grip on to the camera to keep it in your hand
This means 2 things:
1) Your fingers will never get tired since the weight of the camera is distributed over the knuckles of your hand.

2) One-hand operation is significantly easier since the thumb is free to manipulate the buttons on the right side of the camera.

Note however that hand straps require connections to the bottom and the top/side of your camera.

If you're a tripod user, get a bottom connector that [A] has a 1/4-inch mount for attaching tripod plates, or [B] is Arca-Swiss compatible for direct connection to the tripod head.
[3] HOLSTERS
Holsters have the most pros and cons; it's really up to you to decide if it's worth it.PROS:
Holsters are the middle ground with respect to bags and straps. Like bags, they keep your camera in a more comfortable position when you're not actively shooting, but at the same time, you camera still remains accessible. This makes holsters ideal for sporadic shooting (ex. travel photography, landscapes, etc.).Compared to straps, holsters are much better suited for strenuous physical activities (ex. hiking, wall climbing, etc.) since they're less obtrusive. The camera doesn't swing around as much, there are no long straps which can get caught in other objects, and the weight is better distributed on the waist compared to on the neck or the shoulder.
CAVEATS
First of all, holsters require the user to actually wear a belt. Not just any belt for keeping your pants up, mind you; you'd need something that can support the full weight of your equipment for extended periods. If your dress code or fashion sense prevents you from doing that, consider using a neck strap or shoulder strap instead.The second thing to consider is that holsters can also restrict the type of clothes worn on the upper body. A coat, a jacket, or even a relatively large untucked shirt can easily get in the way as you try to grab your camera. Again, consider using a neck strap or shoulder strap if your wardrobe can't accommodate this.

Not a good combination.
Thirdly, depending on your placement on the belt, holsters can make it difficult to pull stuff (ex. wallet, smartphones) out of your pants' pockets. Some options are easier to reposition than others.

Fourth, sitting down requires extra care (and possibly a few adjustments) so that you don't slam your equipment against the chair.

Finally, using a bathroom can become a bit of a challenge. You'll have to take off your gear before loosening the belt and taking care of business. Don't expect sample pictures for this scenario.
STYLES
3.1) Spider Holster

This here is actually a cheap knock-off by CD-R King. I can't comment on the build quality, but the concept of the design remains the same.


Personally, I'm not too fond of the Spider Holster and its derivatives because the weight of the camera dangles around with every movement like a misplaced and swollen testicle of metal, plastic, and glass.
On the flip side, this free motion is exactly what allows this holster to accommodate the weight of an on-camera speedlight.


Given the size of the screw attachment, it's not surprise that this doesn't block the battery/SD card compartment.
3.2) b-grip


In contrast to the Spider Holster, b-grip and its derivatives are rigid, and the longer holster offers better support for longer lenses. This larger footprint means the weight isn't concentrated on the belt alone since some of it is distributed over your hip.
Unfortunately, this rigidity also makes it unsuitable once a moderately-sized speedlight is attached to the camera.


A trigger + mini speedlight is still somewhat workable...


...but a medium-sized speedlight + diffuser is not.
It's also worth noting that the whole piece is made of "fiberglass-loaded technopolymer". Basically, it's lightweight and durable (you could probably bludgeon a few people to death with the thing), but it will flex a tiny bit because it's still plastic. As such, you can directly slap the quick release plates onto certain tripod heads by Manfrotto or Velbon, but the connection won't be rock-solid.

Awkward and flimsy.
I'd rather not use it in this manner.
I'd rather not use it in this manner.
The quick release plate is relatively small. Even on an entry-level DSLR such as the EOS 600D shown here, the plate doesn't block the battery compartment.

Can't say the same for mirrorless cameras such as the EOS M though.

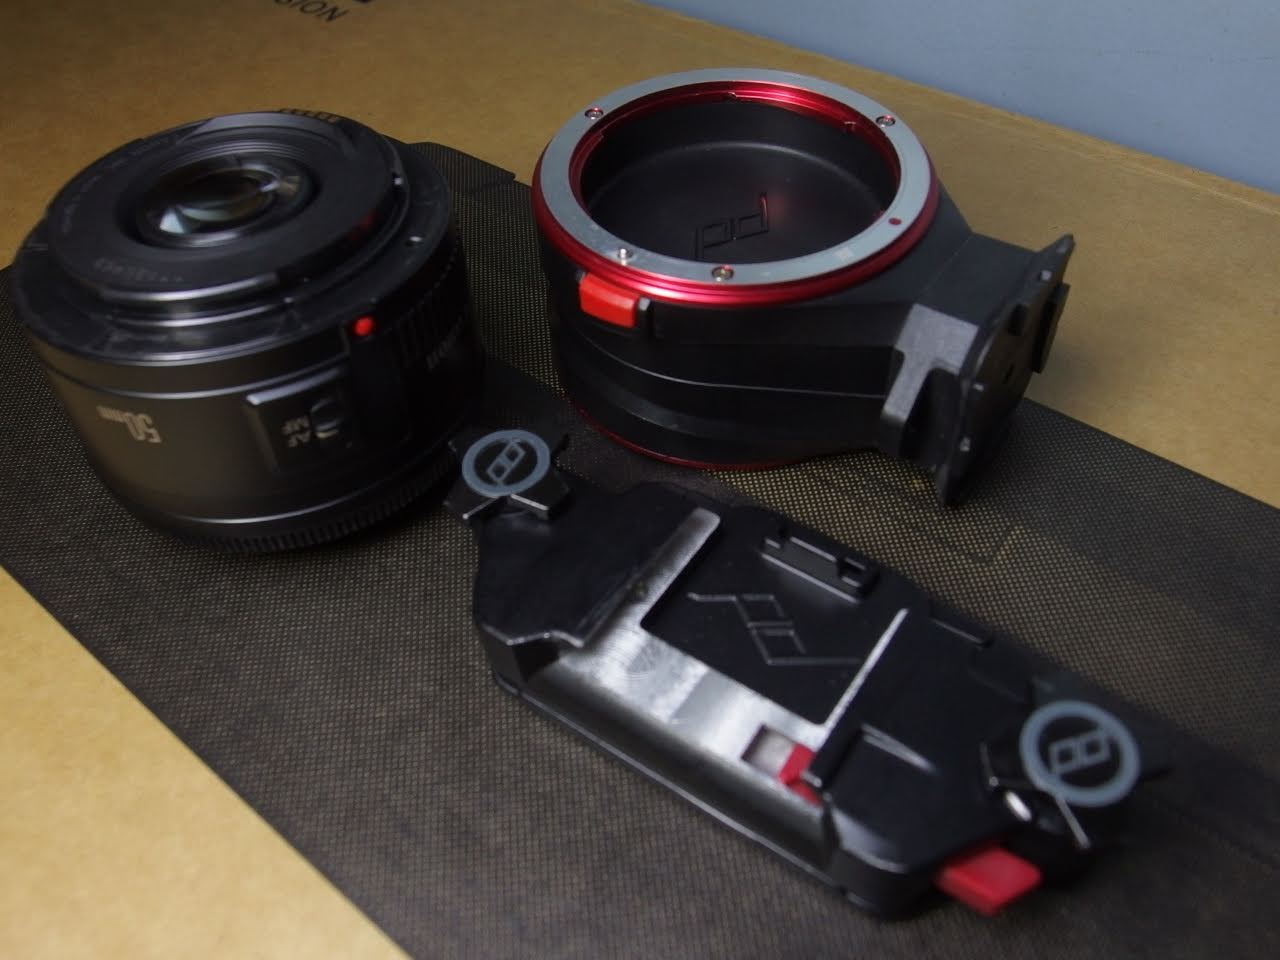
3.3) Capture Camera Clip


Peak Design's Capture Camera Clip has a significantly smaller footprint than b-grip, so the weight of the equipment is really concentrated on the belt instead of being spread out over the hip. However, the Capture Camera Clip has several advantages over b-grip's design.
For starters, their quick release plate is compatible with the de facto standard which is Arca-Swiss. This means that it's significantly easier to look for a compatible tripod head for direct attachment. Their plates are also made of solid aluminum, so they don't flex when attached to a tripod head.

Also, their older plates have slots for hand straps, while the newer plates have holes for wrist straps.

Version 1 (left) and version 2 (right).
As with the b-grip, the Capture Camera Clip doesn't handle on-camera speedlights very well.


Radio trigger + mini speedlight


Medium-sized speedlight + diffuser
Peak Design's plate is small enough that it doesn't block the battery and/or SD card compartment of DSLRs.

However, the version 1 plate is slightly wider than the version 2, so it may still be a problem for some mirrorless cameras.

Version 1

Version 2
One final distinction of Peak Design's system is that it is compatible with their Capture Lens, a tool for quick swapping of lenses.

It does its intended job well enough, but beyond a certain point, it makes more sense to simply carry a second camera body instead of constantly swapping lenses.

No comments:
Post a Comment